GAE, or the Glest Advanced Engine, is open source like its predecessor, so has its source code available to compile. This page goes over the compiling process for GAE in Windows. Compiling for Linux or Mac can be found on their respective pages.
Prerequisites
Checking out the source.
Checkout source
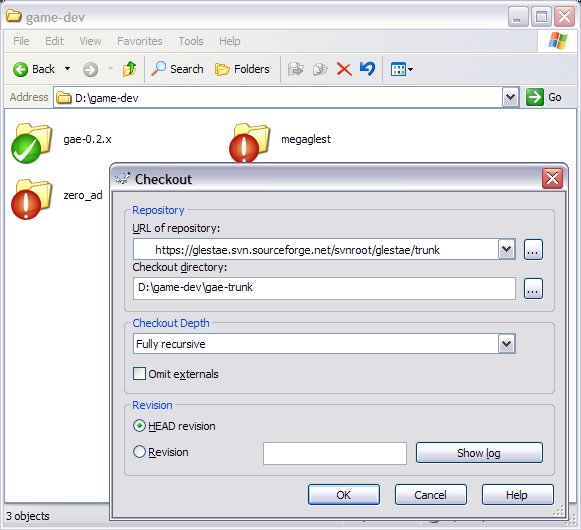
Navigate to where you would like to place the project in your filesystem, right click and select SVN Checkout and enter the URL:
https://glestae.svn.sourceforge.net/svnroot/glestae/trunk
You can change the name of the checkout directory if desired. Hit Ok and wait. The directory you checked out the source to will now be referred to as $SVN_DIR$.
Path setups.
Download dependencies
A windows dependencies package can be found on GAE's Sourceforge page. Download and extract it somewhere. The directory you extracted this package to will now be referred to as $DEP_DIR$.
Compiling
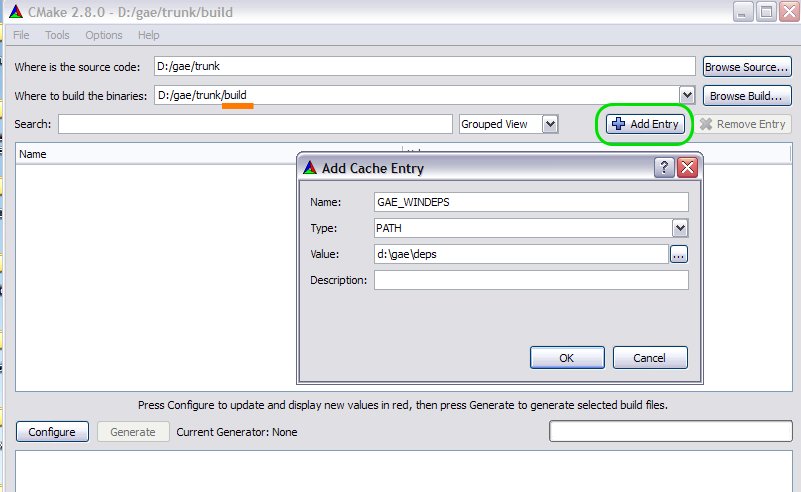
- Start CMake, set the source directory to $SVN_DIR$ and change the build directory to $SVN_DIR$/build, then add an entry called GAE_WINDEPS of type path, and point it at $DEP_DIR$
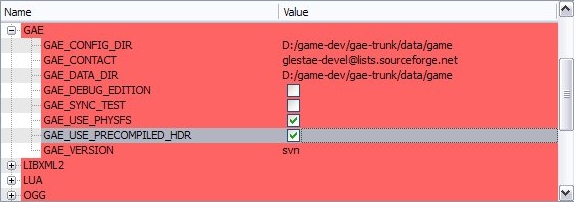
- Press configure, choose the Visual Studio 9 generator, when done switch the GUI to 'grouped' view and expand the GAE section, ensure GAE_USE_PHYSFS & GAE_USE_PRECOMPILED_HDR are checked, and change the GAE_DATA_DIR (and optionally GAE_CONFIG_DIR) to $SVN_DIR$/data/game.
- Press configure again, then press generate.
- The generated project files can be found in the $SVN_DIR$/build directory.
- Before running the game you will need to copy the binary dependencies in $DEP_DIR$/bin to $SVN_DIR$/data/game. (NOTE: You can skip this step if you set the project's working directory to $DEP_DIR$/bin in the next step).
- To run the game from Visual Studio you need to set the working directory (otherwise it won't be able to find the DLLs). Right click on glestadv project and click Properties. Go to Debugging. Set the Working Directory to $SVN_DIR$/data/game. This will need to be done for each configuration (e.g. Debug and Release).
- Now, right click the game project (e.g. glestadv) and set it as the start-up project, you can then launch the game in the debugger using the green play button (or by pressing F5).
Setting the project as the start-up project.
- You may wish to delete projects you do not plan to work with, to streamline the build process.